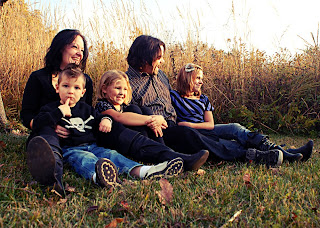
Here is a relatively quick way to give your photos a cool retro feel using Photoshop curves. This method is referred to as cross processing and you will soon see why. It can be achieved by using a single image, and only takes a couple of minutes once your initial edits are completed.
First, prepare your photo as you usually would. I crop to desired size, touch up any rough spots, adjust levels, and then sharpen. If you are not familiar with developing your photos, there are many tutorials on how to do so. I recommend getting The Adobe Photoshop CS5 Book for Digital Photographers (Voices That Matter) by Scott Kelby
Next, add a curves adjustment layer from the layers panel. (the half black half white circle at the bottom of the layers panel) Adding an adjustment layer as opposed to going to Image > Adjustments > Curves is a preferred method because it is non-destructive. That is, you can go back and tweek the effect, or remove it all together if you want.
Once the Curves dialog opens, select the red channel by using the drop down menu.
You are going to add two points on the line as pictured, making an "s" curve by dropping the shadows and raising the highlights.
Do the same to the green channel.
Lastly, adjust the blue channel, but make the "S" curve opposite of how you did the red and green by raising the shadows and lowering the highlights.
Switch the drop down menu back to RGB and you should see a similar image.
Check out the before and after results.
Keep in mind that this effect does not work the same on every photo. For best results, stay away from darker exposed images. Also, play around with your "S" curves, as results differ based on tonal range of individual images and how extreme your adjustments are. Enjoy!!


No comments:
Post a Comment